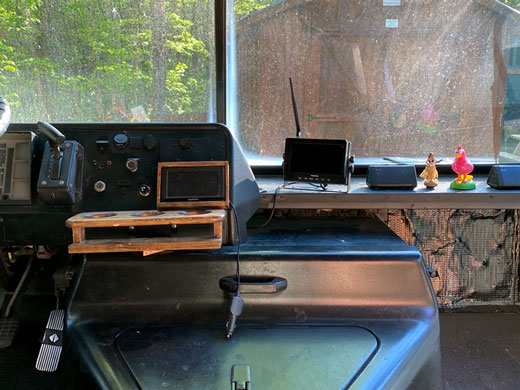
Buslife comes with an array of new challenges you have to overcome that you probably don’t even think about in traditional living. One of the biggest challenges I was faced with was driving such a large vehicle compared to the Honda Civic I was used to driving. Before getting a bus, I towed boats and drove a couple of U-Hauls to bring debris to the dump with my dad, but it wasn't something over 30 feet and it wasn't for an extended period of time.
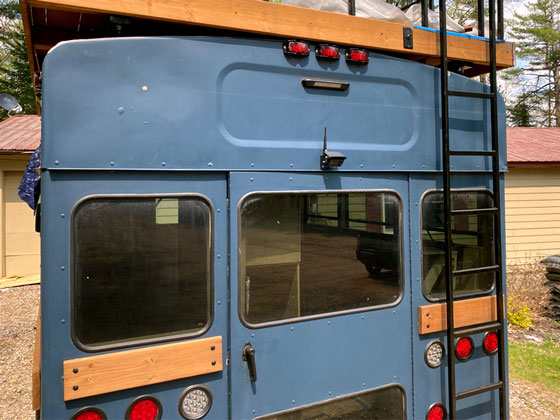
When I first made the transition from a Civic to a 37 foot Thomas Freightliner, I knew that a bus would have much bigger blind spots, be harder to drive, and difficult to back out of parking lots compared to what I was used to. In my original build, I made the back emergency door a garage, so I did not even have a rearview mirror! The solution to my problem was installing a backup camera, little did I know such a small addition to my build would make such a big difference.
While travelling in Navi, my original skoolie, I was meeting a group of friends in New York City. At this time, I had been living in Navi for 2 years and driven over 60,000 miles. My friends had only seen the bus online, so I thought it would be a good idea to bring the bus into the city to show them.
Cool as a clam, I found a big enough space to parallel park on a side street around the corner from the restaurant. My bus and I had been in tight parking situations before but, this was one moment, I realized the importance of a good backup camera. Being able to see multiple sides of my bus at one time, even in the city that never sleeps, I was able to park confidently. My friends still talk about how I was able to park the bus with relative ease!
A back up camera might not teach you to parallel park your bus, but a good system can make it a lot easier. So, let’s take a look at one of my favorite backup cameras from Haloview and the one I use on my buses, the MC7108.
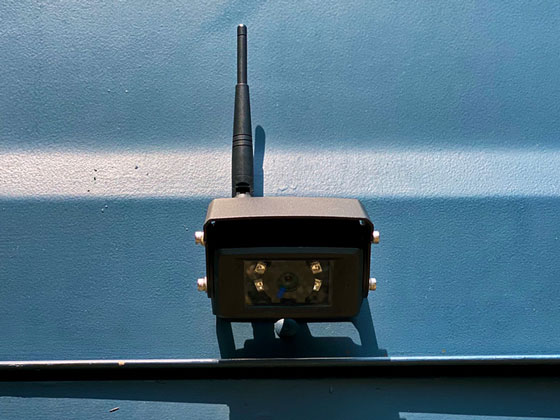
The Haloview MC7108 Wireless Rear View Camera System
The Haloview MC7108 is a wireless backup camera designed for rigs less than 33 feet. [If your rig is bigger than 33 ft. checkout the Haloview RD wireless series.] This camera can capture clear images with a viewing angle of 120 degrees up to 984 feet AND it has 4 night vision IR LEDs which will ensure you have full vision despite the time of day!
One of my favorite features is that this backup system can support up to 4 camera channel inputs. This means that you can add cameras to the rear, side, and dash so that you have an almost 360 degree view of your bus without a lot of extra effort and minimal equipment. Plus, the monitor has 3 different kinds of split video displays so you can look through all 4 cameras at once, 2 at a time, or just 1 full view. This allows you to change what you are viewing on the monitor to get the best view whether cruising down the highway, navigating a narrow road, or merging into traffic.
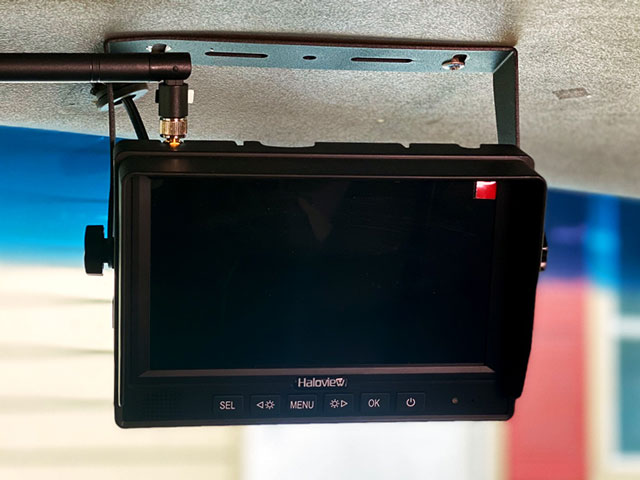
Since my original bus, Navi, had no rear view mirror it would be impossible to see if someone was cutting around my back corner or tailgating when I was attempting to change lanes. To solve this problem, I decided that whenever my bus was on, my back up camera would be on as well.
Since it has a single-channel audio and DVR it makes for a great dashcam or rear cam that you can use for additional safety or insurance purposes and can hold as much data as the SD card you insert. Another really cool feature I learned on my travels is that if you add additional cameras they can be triggered wired so that it will automatically change your monitor view to a side camera when you perform different actions. For example, if you turn your left blinker on, the left side camera image will appear on the monitor. This prevents blind spots so every time you make a turn or attempt to merge you can see the cars beside you.
Wired vs Wireless Systems
Halview does provide both wireless and wired rear view camera systems. Before we continue to talk about the MC7108, I wanted to share some of the differences between Haloview’s wireless and wired systems so that you install the best backup system for you!
To begin, both systems have a smart IR cut function that is anti-vibration for clear images in the day on almost any terrain. However, there are two major differences between the wired and wireless system: 1) The wireless systems can support up to 4 cameras whereas the wired system only supports 3. 2) A standard one camera wireless system takes about 30 minutes to install or 1 hour to install 4 cameras while the wired system with one camera takes about 40 minutes to install or 2 hours to install 3 cameras. Let’s take a look at some of the other differences and the pros and cons between the two systems!
Wired System:
Having a wired system, there is no possibility of signal interference. This means that they have a more stable image. It is also a great feature because in the hustle and bustle of roadlife you don’t have to worry about your antennas being angled correctly; if the antenna of your wireless system is too close to the metal on your rig, it could interfere with the camera signal. With a wired system, as long as your wires are good and it was installed properly, you should not have signal interference issues. This also means with a wired system, your cameras are powered by the monitor, so if the monitor is off the cameras will not work.
On the other hand, you need to install the entire system before building out your conversion, making it difficult to add extra cameras later. Since you need to run wires from the front of your rig to the back, once you install your insulation and framework, it can be difficult to add wires later. Another disadvantage of the wired system is that if you install multiple cameras, this system does not have split mode or trigger wire capabilities, so you can only see out of the camera you choose.
Wireless System:
With a wireless system the monitor and camera are powered separately. This means that you do not have to run wires to the dash monitor, so you can install this system at any point in your conversion...even when it is finished! Since you do not need to run wires, it is easier and quicker to install than the wired systems. Plus, these systems have split mode capabilities so you can see all 4 cameras at the same time! This is great when navigating tricky roads or turns because you have a full view around the sides and back of your rig.
A disadvantage of the wireless system is that if it is installed or not paired properly the metal on the rig could interfere with the signal connection from the camera to the monitor. If you find your signal is consistently poor, you will have to reinstall the cameras in a different area or you will be constantly playing around with the antennas.
Now, that you know the differences between the wired and wireless systems, let's continue to talk about the MC7108.
What You Get in the Box MC7108
When you receive your MC7108 you will get everything you need to successfully install your system. In the box you will find:
- The MC7108 Rear View Monitor
- The MC7108 Rear View Camera
- Center Mount Bracket
- U-support Bracket
- Cigarette Lighter
- Trigger Wires
- Camera Conversion Cable
- BMW Connector Adaptor
- User Manual
The MC7108 system gives you the start of having a function backup camera and monitor system. You can always add an additional camera later to wirelessly connect to the dash monitor later.
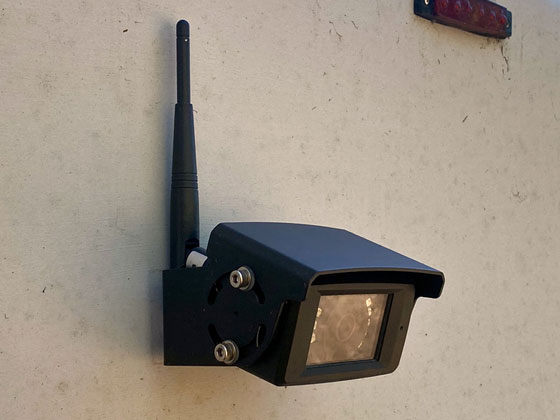
Installing the Haloview MC7108 is super simple and easy despite your experience level. Without any experience it should take you no more than around an hour to install since you do not need to run connectors throughout your rig, you only need power wires. The power wires can be wired into your car radio, a 12 volt cigarette lighter/car port, or hard wired. So depending on how you decide to power your camera will determine how difficult the installation process will be.
Installing your Haloview can be completed in a few short steps.
Step 1: Wire your camera(s) and monitor: For those with one camera, the most common and easy way to power your monitor is to connect the monitor with the provided connector adaptor which is then connected to a cigarette lighter and powered through the car port.
If you have multiple cameras, wiring them using the trigger wires will allow you to assign each camera a task. For example, you connected your left side camera to your left turn signal. As you are driving and use your left turn signal, the left side camera will automatically display on your monitor. This way you do not have to manually change your camera while driving.
Step 2: Pair your monitor and camera(s) together: To do this, on the back of the monitor, hold the OK button for about 3 seconds. Then you push the “pair” button on the back of the camera. Once they are paired, videos will be displayed and you are good to go! Haloview recommends that if pairing is not successful the first time, repower the camera and go through the process again.
Step 3: Find the proper mounting position for you and mount them on your rig: Buses have a lot of metal, so it is essential to find the best signal reception before mounting them by placing the monitor and cameras in their desired position.
When positioning the cameras, there are 2 recommended positions for optimal signal. The first is mounting the camera on the top of your rig’s roof with the antenna in a vertical position. The second is mounting the camera a few inches lower than the roof with the antenna slightly angled off the metal. If the antenna is too close to the metal, the metal will interfere with your signal.
Once you have positioned your cameras and antennas in their desired position, you can check the camera signal strength from the monitor. If you look at the top left corner of the monitor, you will see the signal strength of the camera. If it is less than 3 bars, move the antenna or move the camera closer to the top of the rig. If the signal is more than 3 bars, then you can go ahead and mount that camera.
Now, your Haloview is installed and you are ready to conquer the roads!
Conclusion
Having a good backup camera while travelling is essential. Not only does it make navigating narrow and crowded roads easier, but it also keeps you safe while driving down the highway. With the amount of blind spots that buses have, especially full-sized buses, having security knowing you can watch your blind spots at any moment or performing certain actions, like turning, brings a lot of peace of mind. The ability to have nearly a 360 degree view of your rig at any given time not only protects you while driving, but can come in hand when you are parked too. Now, Buslifers can travel with full security in many situations. Get your Haloview today and gain that peace of mind!
https://www.haloview.com/?acc=fbd7939d674997cdb4692d34de8633c4

